react高阶组件
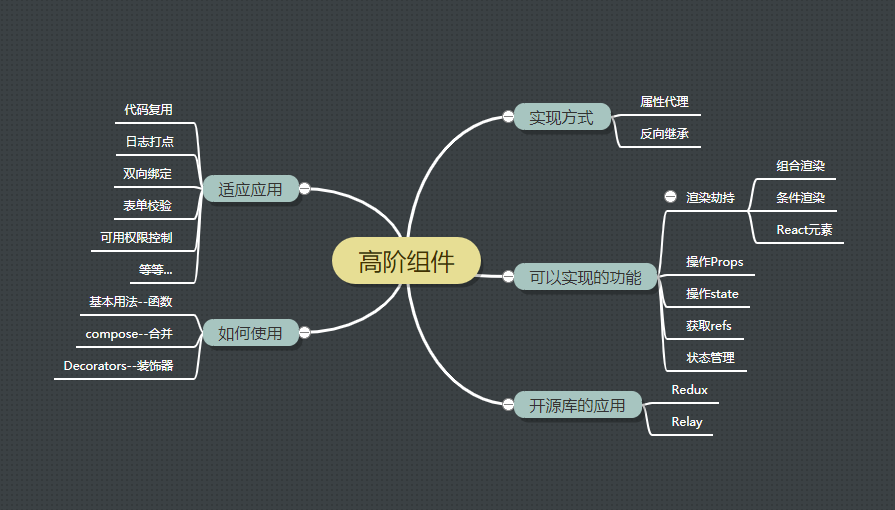
首先,我们先看 官方文档 文档提到,具体而言,高阶组件是参数为组件,返回值为新组件的函数。
接下来官方文档举得例子有点难以下咽,毕竟没能带来直观的感觉。我学习东西还是喜欢拿最最简单的东西举例(应该是我技术渣的原因。。。)
学习这个之前,还是要先回顾一下高阶函数比较好。 通常来讲,高阶函数就是把函数作为参数,或返回一个函数。 最简单的例子
- 1
- 2
- 3
- 4
- 5
- 6
- 7
function fn(num){
  return num
}
function add(x,y,fn){
  return fn(x)+fn(y)
}
console.log(add(3,5,fn))
- 1
- 2
- 3
- 4
- 5
- 6
- 7
- 8
function fn1(x) {
  function fn() {
    return "我是一个高阶函数" + x
  }
  return fn
}

console.log(fn1(1)())
接下来是柯里化
- 1
- 2
- 3
- 4
- 5
- 6
- 7
- 8
- 9
- 10
function fn(num) {
  return num
}
function add(fn) {
  function fn1(x, y) {
    return fn(x) + fn(y)
  }
  return fn1
}
console.log(add(fn)(3,5))
运用柯里化加闭包的知识 即可将参数分解开来,参数分解让你运用更灵活
下面进入正题 高阶组件 首先快速的利用react脚手架搭建一个app
还是这句话,高阶组件是参数为组件,返回值为新组件的函数。 所以我们创建一个js文件,先写一个最普通的组件
- 1
- 2
- 3
- 4
- 5
- 6
- 7
- 8
- 9
- 10
import React from 'react';
class WrappedComponent extends React.Component {
  render() {
    return (
      <div>
        我是需要装饰的组件
      </div>
    );
  }
}
然后还是根据这句话,写一个函数,参数是组件,返回值为新组件,我这稍微添油加醋多写个参数,用来改变装饰器。
- 1
- 2
- 3
- 4
- 5
- 6
- 7
- 8
- 9
- 10
- 11
- 12
- 13
- 14
- 15
- 16
- 17
- 18
- 19
- 20
- 21
- 22
- 23
- 24
- 25
- 26
- 27
- 28
- 29
- 30
- 31
- 32
- 33
- 34
import React from 'react';

const hocComponent = (WrappedComponent, wrapconfig)=> class HOC extends React.Component {
  render() {
    return (
      <div>
        <div>
          hocComponent来装饰你
          wrapconfig也可以用来改变装饰器某些配置
          我用大框框来装饰一下你,一些复用的功能就能在黄色实现
        <WrappedComponent  {...this.props} />

        </div>
      </div>
    );
  }
};


class WrappedComponent extends React.Component {
  render() {
    return (
      <div style={{ ...this.props }} >
        我是需要装饰了
      </div>
    );
  }
}
const wrapconfig = { width: 500, height: 500, backgroundColor: "yellow" }
const HOCdemo = (WrappedComponent, wrapconfig)=> hocComponent(WrappedComponent, wrapconfig)


export default HOCdemo(WrappedComponent,wrapconfig);
如此 这个HOCdemo的这个组件就能返回一个具有黄色框框的包装的组件,他的props由自己控制即可
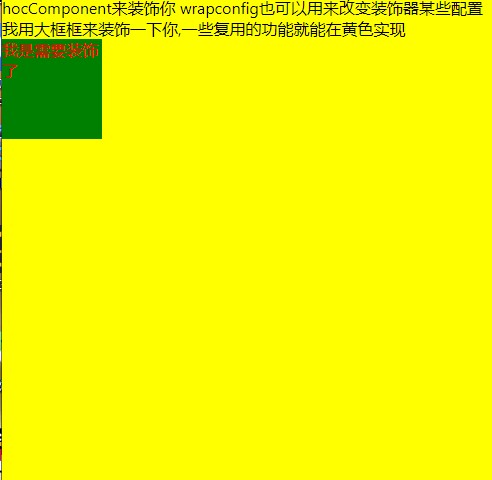
如此我们可以拿这个组件包装任何一个组件,返回一个具有黄色框的组件
接下来我们来尝试两层最简单的包装
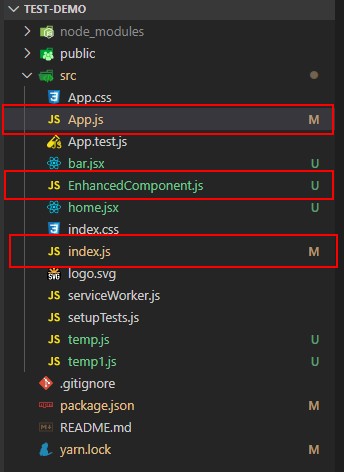
我们的目的是包装App这个文件 App.js
- 1
- 2
- 3
- 4
- 5
- 6
- 7
- 8
- 9
- 10
- 11
- 12
- 13
- 14
- 15
- 16
- 17
- 18
- 19
- 20
- 21
- 22
//这个组件是我们的主组件,需要被包装
import React from 'react';
import EnhancedComponent from "./EnhancedComponent"


class App extends React.Component {
  render() {
    //不要在 render 方法中使用 HOC
    // const Hoc=EnhancedComponent(WrappedComponent)(wrapconfig)
    return (
      <div style={{ ...this.props }}>
        我是需要被包装的Conmponent
      </div >
    );
  }
}

//这个用来自定义包装器的配置
const wrapconfig = { width: 500, height: 500, backgroundColor: "yellow" }
const wrapconfig1 = { width: 300, height: 300, backgroundColor: "red" }

export default EnhancedComponent(App)(wrapconfig,wrapconfig1);
这个是我们的高阶组件,用来包装App
EnhancedComponent.js
我们在此处写上两层装饰
- 1
- 2
- 3
- 4
- 5
- 6
- 7
- 8
- 9
- 10
- 11
- 12
- 13
- 14
- 15
- 16
- 17
- 18
- 19
- 20
- 21
- 22
- 23
- 24
- 25
- 26
- 27
- 28
- 29
- 30
- 31
- 32
- 33
- 34
- 35
- 36
- 37
- 38
- 39
- 40
import React from 'react';

const hocComponent = (WrappedComponent, wrapconfig)=> class HOC extends React.Component {

  render() {
    return (
      <div >
        <div style={wrapconfig}>
          hocComponent来装饰你
          wrapconfig也可以用来改变装饰器某些配置
          我用大框框来装饰一下你,一些复用的功能就能在黄色实现
        <WrappedComponent  {...this.props} />

        </div>
      </div>
    );
  }
};


const hocComponent1 = (WrappedComponent,wrapconfig1)=>class HOC1 extends React.Component {
  render() {
    return (
      <div style={wrapconfig1}>
        hocComponen1来装饰你
        <WrappedComponent {...this.props} />
      </div >
    );
  }
}


// compose(f, g, h) 等同于 (...args) => f(g(h(...args)))

//这里柯里化一下
const HOCdemo = WrappedComponent=>(wrapconfig,wrapconfig1)=> hocComponent(hocComponent1(WrappedComponent,wrapconfig1),wrapconfig)


export default HOCdemo;
index.js
- 1
- 2
- 3
- 4
- 5
- 6
- 7
- 8
- 9
- 10
- 11
- 12
- 13
- 14
import React from 'react';
import ReactDOM from 'react-dom';

import App from './App';
import * as serviceWorker from './serviceWorker';


ReactDOM.render(
  <React.StrictMode>
    <App  color="red" width="100px"  height ="100px" backgroundColor= "green"/>
  </React.StrictMode>,
  document.getElementById('root')
);
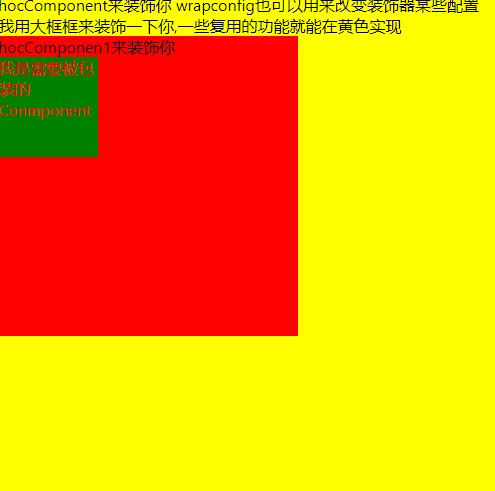
其实依旧不是很清楚这里的柯里化真正实用的地方在哪,估计要以后用到实际情况才能理解。此文章自我理解依旧不是很通透,仅做参考。
(完)
0条看法
最新最后最热
等待你的评论


